Archive for the ‘rental house improvements’ Category
Friday, September 26th, 2008
.
.

The search continues for a new investment house. As soon as my wife and I identify & purchase our next fixer-upper, we will move into it and rent out the one we are in now.
A lingering question related to our present house that we haven’t resolved yet is, what do we do with the swimming pool in the back yard? When we bought the house, the pool had already been installed, but it was missing a pump, it doesn’t have a guard fence, and it probably needs to be painted. We have put off the decision of what to do with the pool until last.
Initially, the plan was fix the pool and sell the house. Now that it will become a rental, the question arises “what if a tenant falls in the pool and drowns?”. Wouldn’t it be better to just put a cover over it and not fill it with water? My inclination is the later.
Watch this space for further developments . . .

 Subscribe in a reader
Share this: del.icio.us | Digg | Ma.gnolia | Reddit | Stumble Upon |
Tags:investment property, rental property insurance, swimming pool
Posted in rental, rental house improvements, rental houses, rental management, rental properties, rental property, rentals, repairing properties, repairing rental houses, swimming pool | 4 Comments »
Monday, April 7th, 2008
‘
There are very few conversations that include the word “grout” in them. Grout is one of the most under utilized words, and unappreciated substances in the English language. Yet, where would tilers be without grout? And yes, where would all of us who have tiled floors or walls be without this cementy substance?
This weekend, in a never-ending effort to finish repairing our fixer-upper house so we can rent it out, the family undertook to tile the closet floor. This was one of several smaller do-it- yourself projects that remain to be done before we can call this house finished.
Here is how it went down.
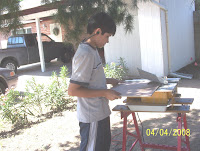
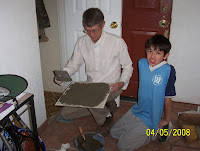
Step 1.
Number 1 son expertly cuts tile for the floor (note ear plugs -not an MP3- for protection).
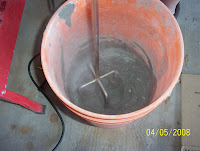
Number 1 son precisely mixes the mortar to the right “peanut buttery” consistency.
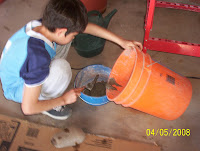
Number 2 son carefully transfers the mortar from the mixing bucket to the transfer bucket.
Number 2 son and I precisely apply mortar to back of tile. Number 2 son expresses amazement over incredible precision.
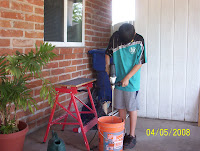
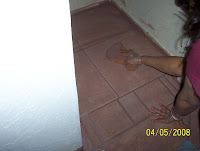
Angy relentlessly spreads the much-anticipated “grout” into the spaces between tiles.
Subscribe in a reader
Share this: del.icio.us | Digg | Ma.gnolia | Reddit | Stumble Upon |
Tags:do it yourself, preparing grout, repairing fixer upper houses, repairing rental houses, using grout on tiling project
Posted in do it yourself, grout, mortar, rental house improvements, repair, repairing properties, repairing rental houses, repairs, tile, tile cutting | 2 Comments »
Friday, December 21st, 2007
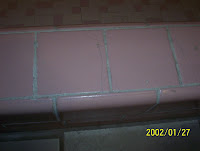
A common problem encountered in older houses is the grout can look dirty. For the 1957 fixer upper house that my wife and I are presently working on, the tile grout in the master bathroom was dingy (see picture above). My plan since I bought the house was to remove the old grout and replace it with new grout.
However, last week before beginning the grout removal, I checked my copy of Home Depot’s book “Tiling 1-2-3“. The book suggested cleaning the grout to bring it back to its old glory.
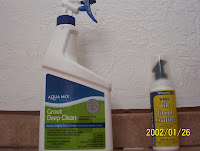
So I purchased some Agua Mix Grout Deep Clean, and some White Tile Grout Coating for good measure.
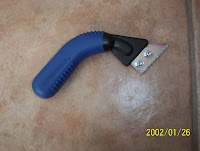
First, I used my grout saw to lightly scrape off dark spots in the grout.
Then, I used the Grout Deep Clean, which to my surprise, actually did make the grout look cleaner. I let the liquid “dwell” on the grout for 5 minutes, I “agitated” it with a scrub brush, then I waited 2 hours for it to dry. But it still wasn’t as bright as I would have liked.
Next, I liberally applied the Tile Grout Coating to the grout.
The coating did a remarkably good job of coloring the grout to a strong color of white. I was very happy with the results. After the coating dried I applied grout sealer.
After all was done, the grout looked like this.

So, the lesson is, as long as the grout is not badly cracked, you’re better off cleaning and coating the old grout. It can save you a lot of time.
Info on Terry’s Book
Subscribe in a reader
Share this: del.icio.us | Digg | Ma.gnolia | Reddit | Stumble Upon |
Tags:Fix em Up Rent em Out, fixing tile grout in old houses, repairing fixer upper houses, tile grout coating
Posted in fix up houses, fixer upper houses, fixer uppers, fixer-upper business, fixing rental houses, grout, grout replacement, house repair, house repairs, learn repair skills, learn to make repairs, making repairs, property damage, real estate books, rehab, rental house improvements, repair, repair books, repairing properties, repairing rental houses, repairs | 1 Comment »
Wednesday, November 28th, 2007
Although this can be a tricky concept it’s well worth the time spent in understanding it. As described in IRS Publication 527, Residential Rental Property, each year when you file your tax forms you can deduct the cost of repairs to a rental property, but you cannot deduct the cost of improvements. You recover the costs of your improvements when you take depreciation for your property. The difference between the two concepts is easier to grasp by looking at some examples.
Repairs
A repair, as the name implies, fixes something that is broken. It doesn’t add to the value of your property or extend its life. Examples of repairs include:
inside or outside painting
repairing gutters
fixing floors
fixing leaks
plastering
replacing broken windows
Improvements
Improvements add to the value of a house prolong its life, or adapts it to new uses. Examples of improvements include adding:
a porch, deck, patio, bedroom or bathroom
landscaping, a driveway a fence or a swimming pool
a heating system or air conditioner
a water heater, soft water system or filtration system
flooring, wall-to-wall carpeting of kitchen modernization
insulating attics walls, floor, pipes or ductwork
Improvement costs are capitalized, meaning that you recover the costs by taking depreciation over time.
Info on Terry’s Book
Subscribe in a reader
Share this: del.icio.us | Digg | Ma.gnolia | Reddit | Stumble Upon |
Posted in house repairs, rental house improvements, repairing rental houses | 2 Comments »
Sunday, November 18th, 2007
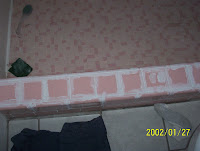
Sunday, work continued on the fixer-upper house that we live in, and plan to sell (for more info on this investing strategy, see “How to Turn Your Home into a Rental Property, Instead of Selling It!” coming in Sept. 2012.) There was a little grouting left to do in one of the
bathrooms, around the tiles that made a baseboard-type border abound the bathroom floor.
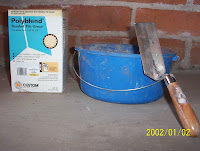
Here are the tools I used – small bucket, white grout, a trowel, and a small “mud” (or joint compound) spatula (not pictured)
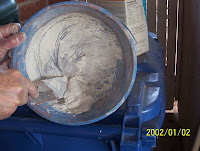
I mixed up a small amount of grout. Add water to the powder until you have grout the consistency of peanut butter.
When I mix grout, I wear a mask or kerchief to cover my mouth and nose. The grout mix contains cement, so if you breath in the powder it can scar your lungs.
I apply the grout with the small spatula.

Afterwards, I clean up tools with water.
After the grout has cured for three days, I apply grout sealer.
There are two pretty good books on floors and tiling published by Home Depot, “Tiling 1-2-3” and “Flooring 1-2-3“. I recommend “Flooring 1-2-3”, if you just want to buy one book. It cover tiles about as well as the other book, and also addresses how toinstall several other types of flooring. I used it as a guide to install both laminate flooring, and vinyl flooring.
As always, to make money in the fixer-upper business its best to do everything yourself. You learn by doing. Start small but work up to bigger projects.
Our first tiling project was in a small bathroom, a good place to learn the process. But since then, my wife and I have worked our way up to doing large bedrooms. We feel comfortable tackling any tiling project now.
Subscribe in a reader
Share this: del.icio.us | Digg | Ma.gnolia | Reddit | Stumble Upon |
Tags:books on tiling and flooring, do it yourself, fixer upper house business, grouting project in bathroom, Home Deport books, start, turn your home into a rental property
Posted in do it yourself, fixer upper houses, fixer uppers, fixer-upper business, fixing rental houses, grout, house repair, house repairs, how to turn your home into a rental property, making repairs, rental house improvements, rental houses, rental properties, rental property, rentals, repair, repair books, repairing properties, repairing rental houses, repairs, small investor, start small, Uncategorized | 2 Comments »
Tuesday, November 13th, 2007
Veterans Day my wife and I, as veterans of many fixer upper house battles, refinished the hall cabinets and painted bathroom and bedroom doors.
The permanent hall cabinets had been scratched up in the fixer-upper house that we are living in and repairing, to ultimately turn into a rental house .
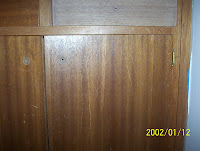
Steps in refinishing wood cabinets:
Step 1: Take off the cabinet doors.
Step 2: Remove the old paint or stain. I used 150 grit sandpaper.
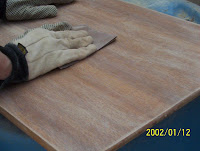
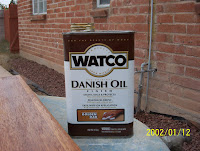
Step 3: Apply stain. I used Watco Danish Oil, which is applied with a rag and is used to both protect wood as well as to stain it. Make sure you apply test patches of your stain to an inconspicuous area of the piece to be stained. Most stains dry a shade or two darker than the color you see.
You control the color by the length of time you let the stain penetrate the wood. If it gets too dark, moisten a clothe with the recommended thinner and wipe again to dilute and wash away some of the pigment. Since this stain is oil-based, make sure you either work outside or have plenty of ventilation.
If the wood is thirsty, it may take more than one coat to get a smooth finish. Wipe in the direction of the grain.
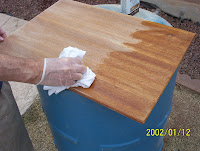
Step 4: I’ll apply polyurethane after the last coat dries, for extra protection.
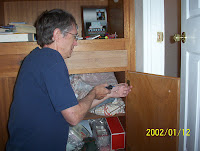
Angy expertly painting a bedroom door. She’s using Behr’s Ultra Pure White, Semi-Gloss Enamel (Wait, I’m not ready!).
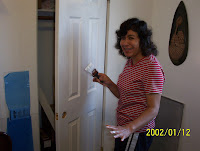
For more info on converting a house to a rental, see my new book (due out September 2012) entitled “How to Turn Your Home into a Rental Property, Instead of Selling It!”
Subscribe in a reader
Share this: del.icio.us | Digg | Ma.gnolia | Reddit | Stumble Upon |
Tags:fixer upper houses, house repair, painting, refinishing cabinets, turn your home into a rental house
Posted in fixer upper houses, fixer uppers, fixer-upper business, fixing rental houses, house repairs, how to turn your home into a rental property, learn repair skills, making repairs, refinishing wood, rental house improvements, repair, repairing properties, repairing rental houses | No Comments »
Sunday, October 7th, 2007

As fixer upper rental house business owners, its good to know how to do as many repair jobs as possible, however, when a job is too technical and beyond your abilities, or too tedious, like a large painting job, it’s time to contract the job out.
The secret in dealing with contractors is that it’s better to pay by the job instead of by the hour. If you pay by the hour, whoever you contract with can bleed you dry by working many more hours than anticipated. If you can get the contractor to set a fee before beginning the job, he absorbs the cost of working the extra hours instead of you.
This technique works well if you are hiring a non-professional, like high school students to paint outside trim work for you. However, it doesn’t always work so well if you are hiring a highly skilled electrician or plumber. Sometimes they’ll give you a set price, but mostly you pay them by the hour.
I have a highly skilled handy man I call in for jobs over my head, and I always pay him by the hour. He often will make repairs at my rental properties at odd hours and respond quickly to emergency situations. Without him, I’d almost have to quit may day job to keep up with repairs. When you have someone like that, you do whatever you have to, to hang on to them.
Subscribe in a reader
Share this: del.icio.us | Digg | Ma.gnolia | Reddit | Stumble Upon |
Tags:contracting out jobs, cutting repair costs, fixer upper rental house owners, handyman, pay by the hour not by the job
Posted in fixer upper houses, fixer uppers, fixer-upper business, fixing rental houses, house repair, house repairs, learn repair skills, learn to make repairs, making repairs, rental house improvements, rental management, repairing properties, repairing rental houses, repairs | 2 Comments »
Saturday, September 22nd, 2007

When operating a fixer-upper rental house business we must constantly be on the look out for short cuts to reduce our costs.
For example, a good way to buy a home furnace is to keep your eyes open for good-looking used one at yard sales. I came across one for $30 at a yard sale. There were actually two for sale, and I bought the newer, better-looking one. I offered $25 dollars, and when the lady wouldn’t take it I drove off thinking she was too inflexible. But, as I drove away, I came my senses as I asked myself, “where else am I going to get a good-looking furnace for $30?” I immediately turned my truck around and bought the furnace.
I knew I would need one soon for one of my rental houses. Looking back, I probably should have bought them both and kept one for the next time I needed one.
A friend of mine and I installed the furnace ourselves. Its a pretty simple matter to hook up the gas pipe and thermostat wiring. The major cost was about $40 for a guy to make a tin hood that connected the furnace to the duct work in the ceiling. Other parts, connectors, screws, etc., were about $30-40. I had a professional check out the work when we finished and viola! I had a working furnace for a fraction of what it could have cost though normal channels.
Of course, in buying used, you always take the chance of getting a furnace that doesn’t work But, in my experience, it’s worth taking a chance, and many times you hit the jackpot and can save hundreds, if not thousands, of dollars. Keep your eyes open at those yard sales!
The lessons are, in order to maximize profits with your rental properties, to buy things as cheaply as possible, and to install them yourself. You can save a lot of money by buying ahead of time, when things are on sale. Don’t wait until the day the furnace breaks or the toilet kicks the bucket. You can usually see signs of these things sputtering before they finally go out. Take advantage of that knowledge to make a preemptive strike, and to purchase ahead.
Subscribe in a reader
Share this: del.icio.us | Digg | Ma.gnolia | Reddit | Stumble Upon |
Tags:buy ahead of time, buying a used furnace, fixer upper rental home, learn to make repairs, maximize rental house profits
Posted in fix up houses, fixer uppers, learn repair skills, learn to make repairs, making repairs, maximize rental profits, rehab, rental house improvements, rental houses, rental properties, rental property, rentals, repair | 2 Comments »
Friday, September 14th, 2007

One of the surest ways to make money in any endeavor is to follow in the footsteps of other successful people. Astronaut Neil Armstrong followed in the steps of John Glenn. Comic actor Ben Stiller followed in the steps of his show biz parents Stiller & Meara. The same is true in real estate. Plenty of people have gone before us.
Buying lower-priced fixer-upper houses, using your own time & effort to fix them up, and renting them out has been a tested and true path to generate wealth & security.
The four chief benefits of purchasing fix-up houses are:
1) if you buy a house in need of repair, a fixer upper house, you pay less for it than for a house in good shape. Since you paid less, you can take out a smaller loan and have lower monthly payments.
2) By doing repairs yourself (as much as you are able to), you save the money you would have paid others, and you learn new repair skills.
3) By renting it out, you get a house that is constantly increasing in value (by an average 5% per year) the same time the rents are going up.
4) When you get older, your loans will be paid off (or close to it) and the rental income you receive are like a pension for your retirement.
Granted, it is hard work to find a house, make repairs and learn how to deal with tenants. But you also learn valuable technical and people management skills that you can use in other parts of your life, and pass along to others. Mostly, there is a great sense of satisfaction in your accomplishments, a stronger sense of security, and more income, which means more freedom.
Share this: del.icio.us | Digg | Ma.gnolia | Reddit | Stumble Upon |
Tags:doing repairs yourself, financial freedom, fixer upper houses, how to start a rental house busiiness, learn repair skills, rental income is like a pension for retirement, renting out a house, stick to the basics
Posted in buying fixing renting rehabs, buying real estate, create wealth in real estate, do it yourself, fix up houses, fixer upper houses, fixer uppers, fixer-upper business, fixing rental houses, home buying, house repair, house repairs, how I got started in fixer uppers, how to make money renting housing, how to start a real estate business, How to start your own house fix up and rental busines, invest real estate repai and sell or rent, investing, investing in real estate, investing in your spare time, investment house, investment property, investments, investmet properties, learn repair skills, learn to invest in real estate, learn to make repairs, real estat investing, real estate, real estate principles, rental house improvements, rental houses, rental management, rental properties, rental property, rentals, repair, repairing properties, repairing rental houses, safe ways to invest in real estate, small investor, spare time | 1 Comment »
Monday, September 10th, 2007
For those of us in the fixer upper rental house business I like to share interesting books that I happen to be reading.
I am presently reading Bryan Wittenmyer’s book Perpetual Income: How to Generate Cash Flow from Low-End House Investment. The author writes a book that truly gets down to the nuts of bolts of all aspects of finding, buying and renting low-income properties. A lot of real estate books are 90% fluff and 10% substance. This book is 100% substance.
The key, as Wittenmyer explains it, is to buy low-end (and not slum) housing because it is cheaper to buy, pays a pretty good monthly rent, and can be paid off quickly. This book has an enormous amount of really practical suggestions that apply to both low-end housing as well as middle-end properties.
I particularly enjoyed his section on what to repair, in recognition of the fact that the tenants will not take care of the property anyway. I like his practical advise on how to repair typical rental problems, but by spending the absolute least amount of money in the process. One suggestion was to mix leftover paints together in a five gallon paint bucket, and use the resulting grey paint to paint attics, or other areas where the color doesn’t matter. He also suggests not washing a wall before painting (unless heavy dirt exists) because paint can do a great job of covering the fingerprints and odors. Wittenmyer says, “why waste time cleaning when you can paint over it?”
I couldn’t agree more.
Share this: del.icio.us | Digg | Ma.gnolia | Reddit | Stumble Upon | Technorati
Tags:Bryan Wittenmyers, do it yourself, fixer upper rental house business, house repairs, how to generate cash flow from low-end house investment, Perpetual Income, rental house repairs
Posted in fixer upper houses, fixer uppers, fixer-upper business, fixing rental houses, for rent, house repair, house repairs, real estate investing, rental house improvements, rental houses, rental properties, rental property, rentals, renting, repair, repair books, repairing properties, repairing rental houses, repairs | No Comments »


